
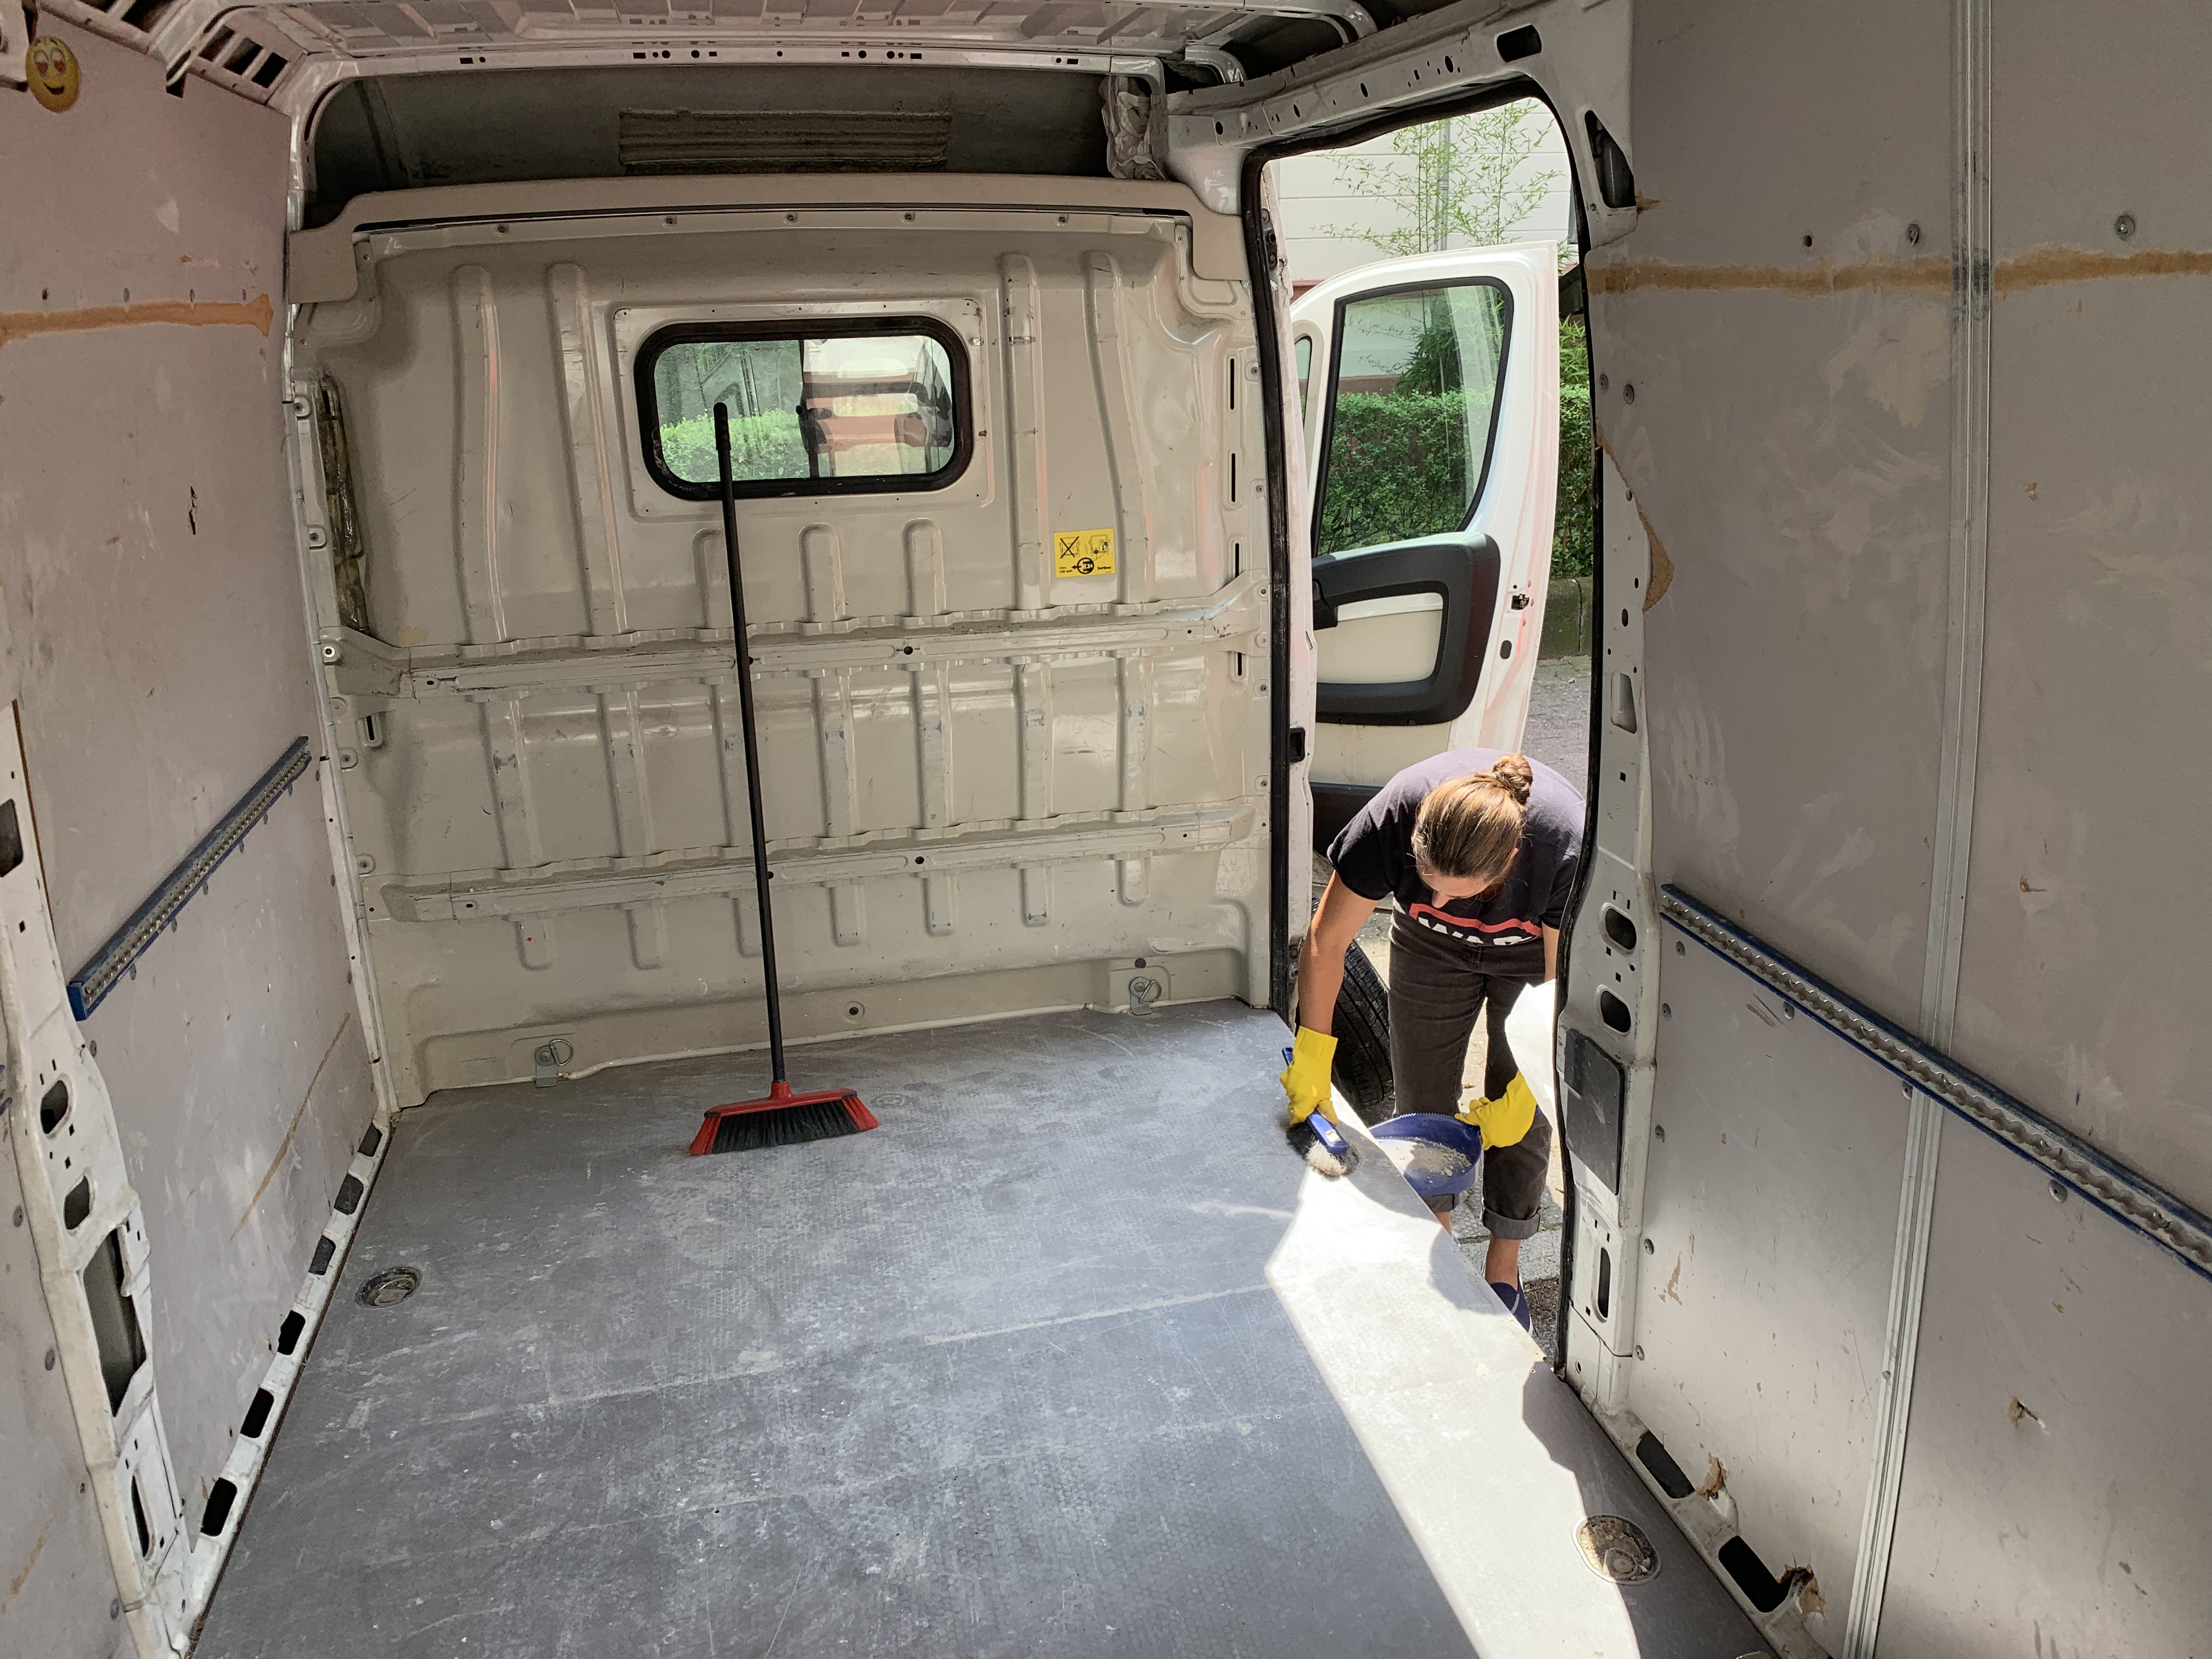
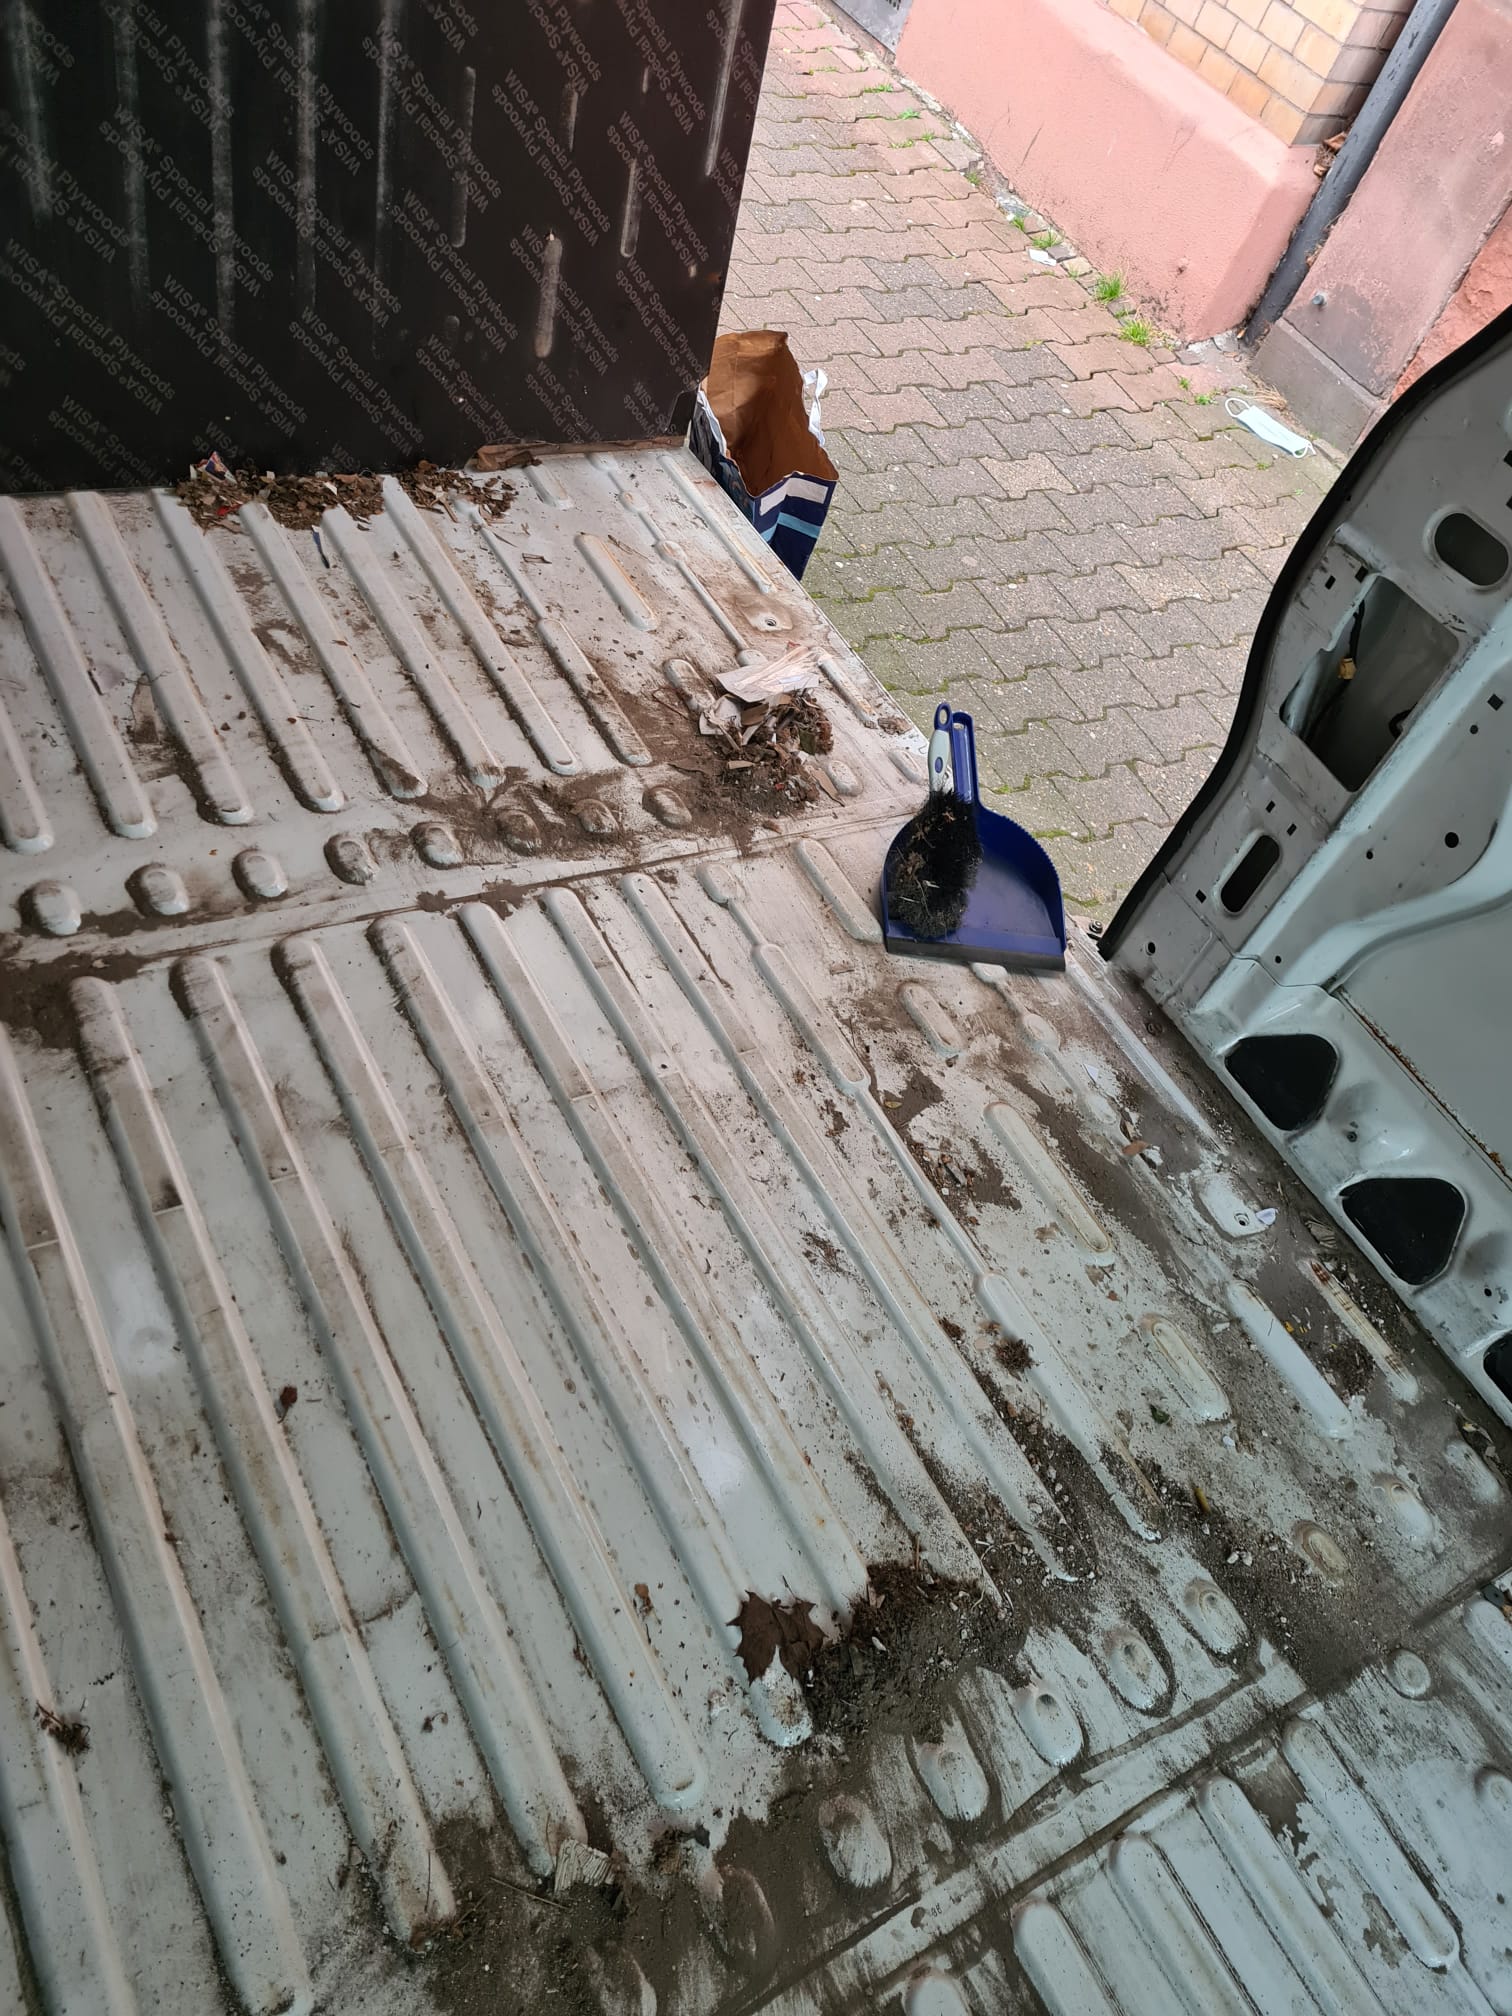
Now that the first set of windows are in it was time to start on the floor, which was a particularly filthy job. As we’d bought an ex-work van and after years of service there was a lot, and I mean a lot, of dirt to clean up under there.
First step was to take up the existing flooring boards and clean underneath, then once the dirt was gone we removed the retaining strap bolts, sealed the holes, then repainted the entire surface with anti-rust paint.
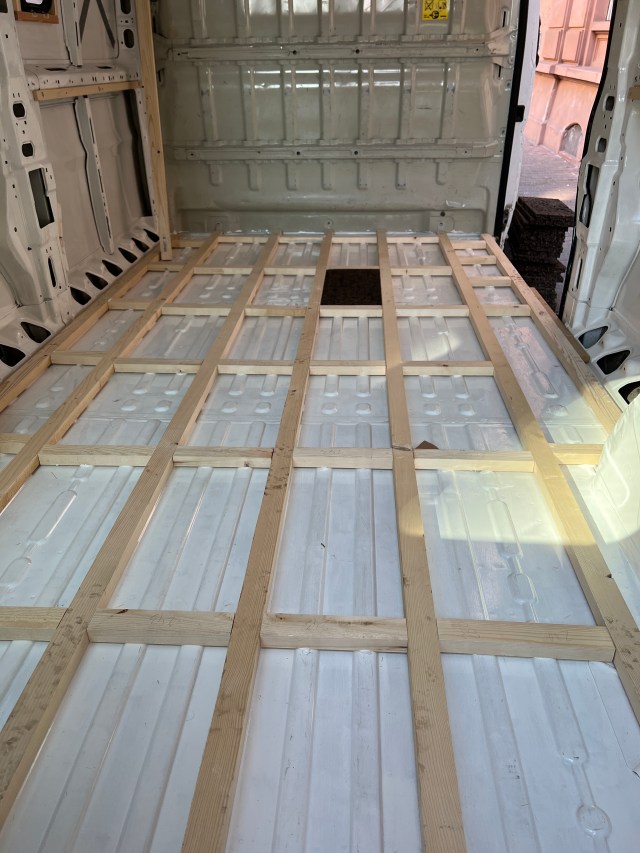
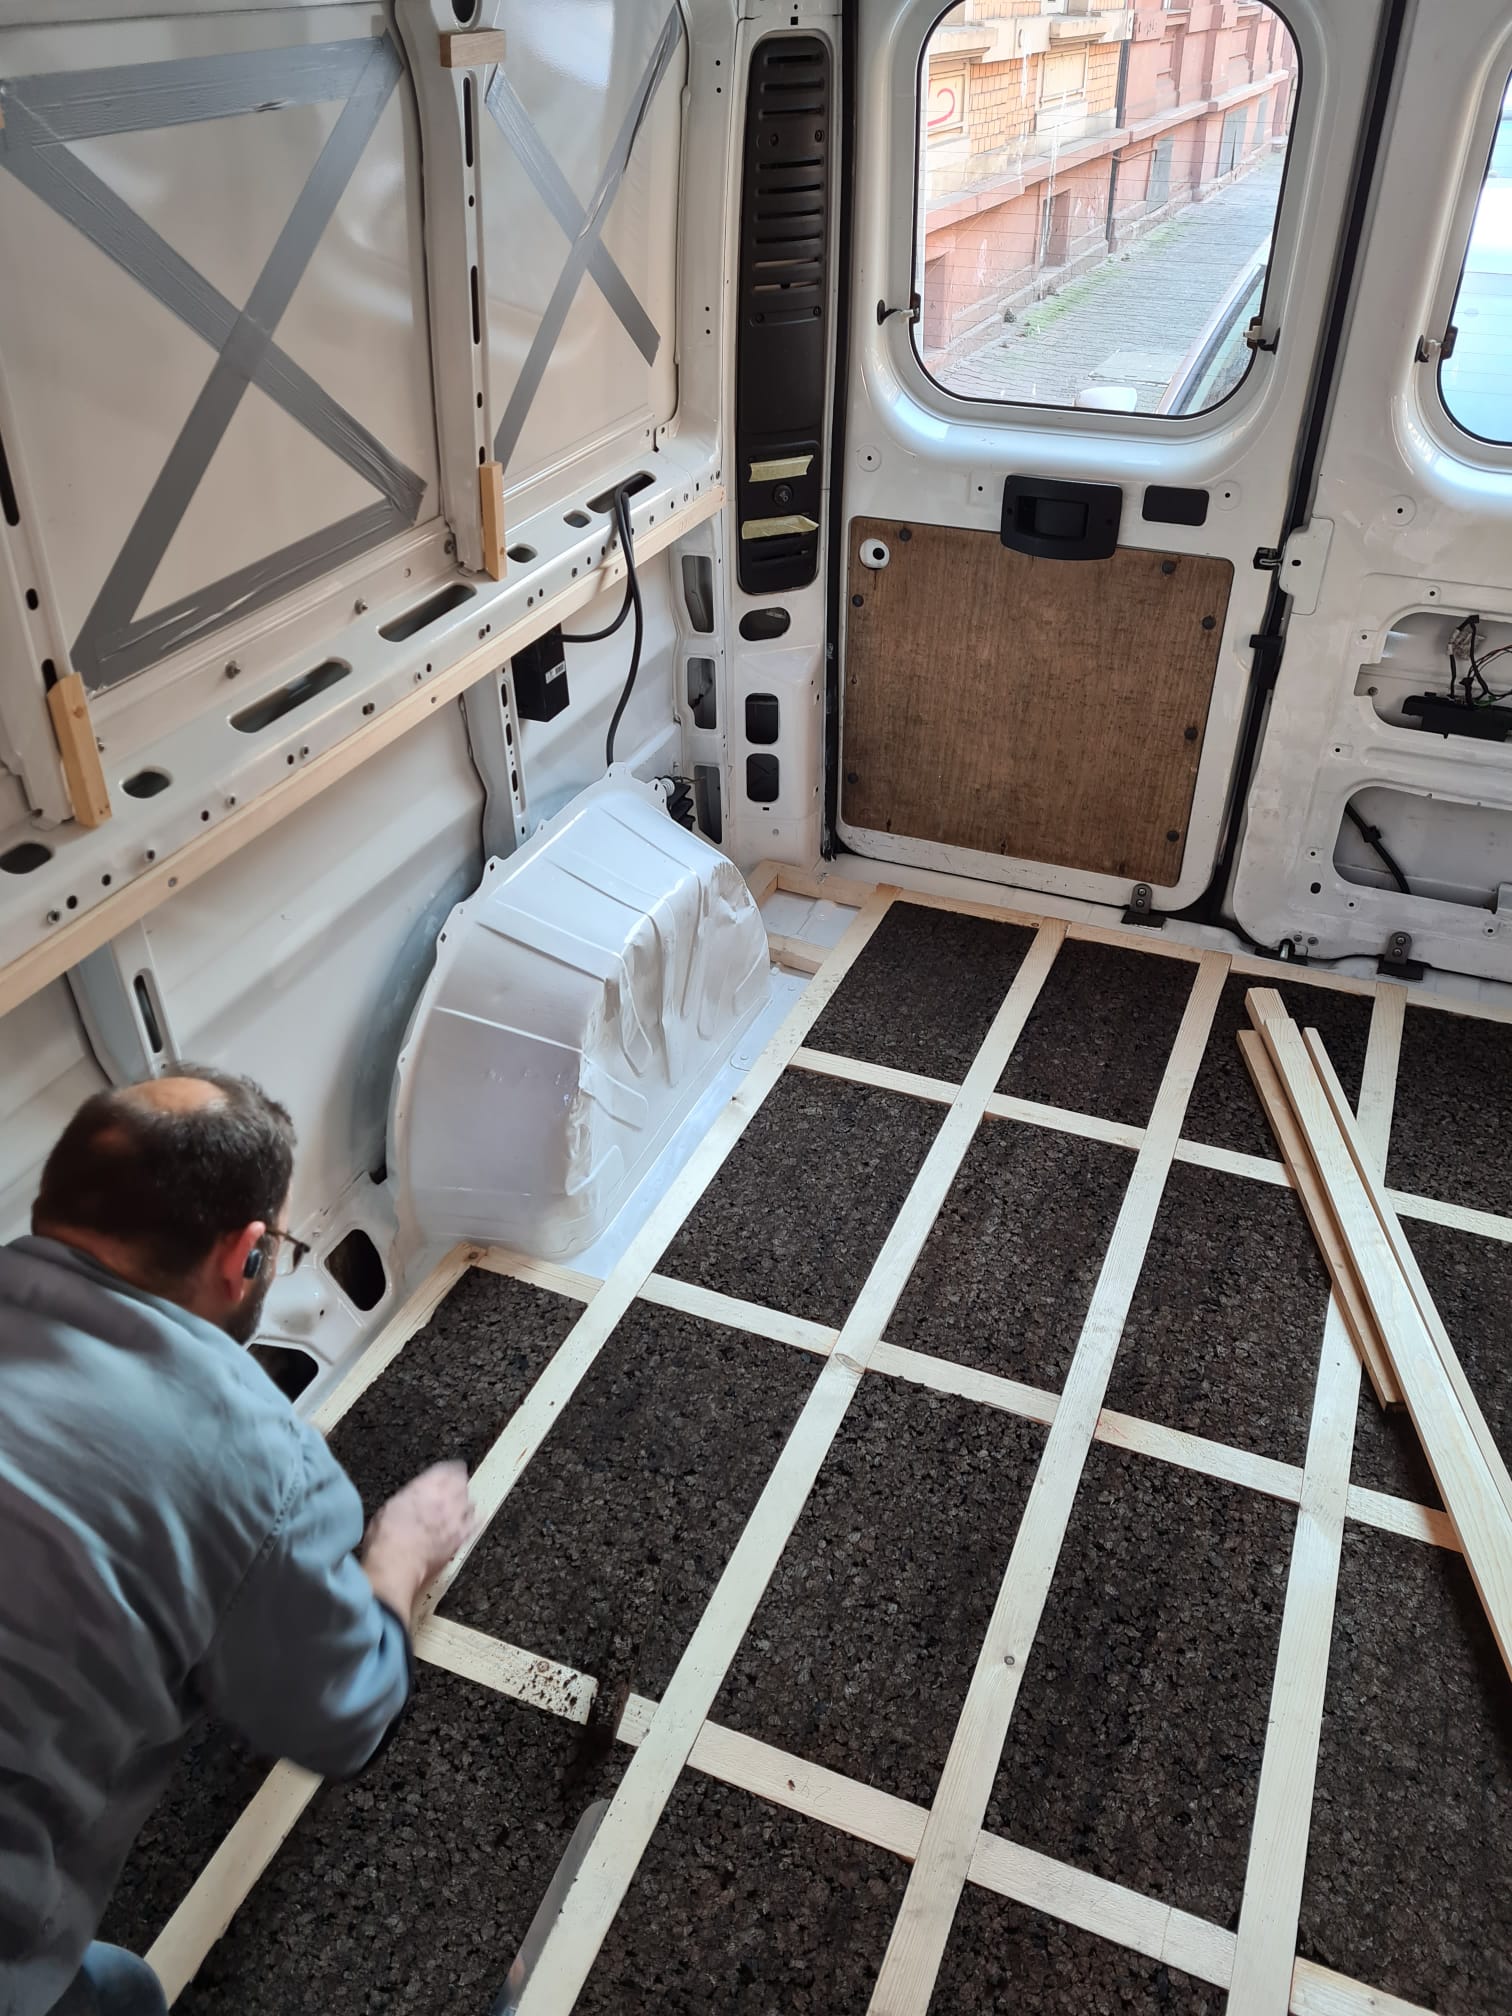
Once the paint was dry we created a supporting grid to lay the floor on to by laying down and gluing 50mm x 30mm battens, with the 50mm edge parallel to the floor of the van to support the boards when we put them back down.
We used an adhesive called Tec-7 which is incredible – I’ve stuck wood to the ceiling using it and hung off it!
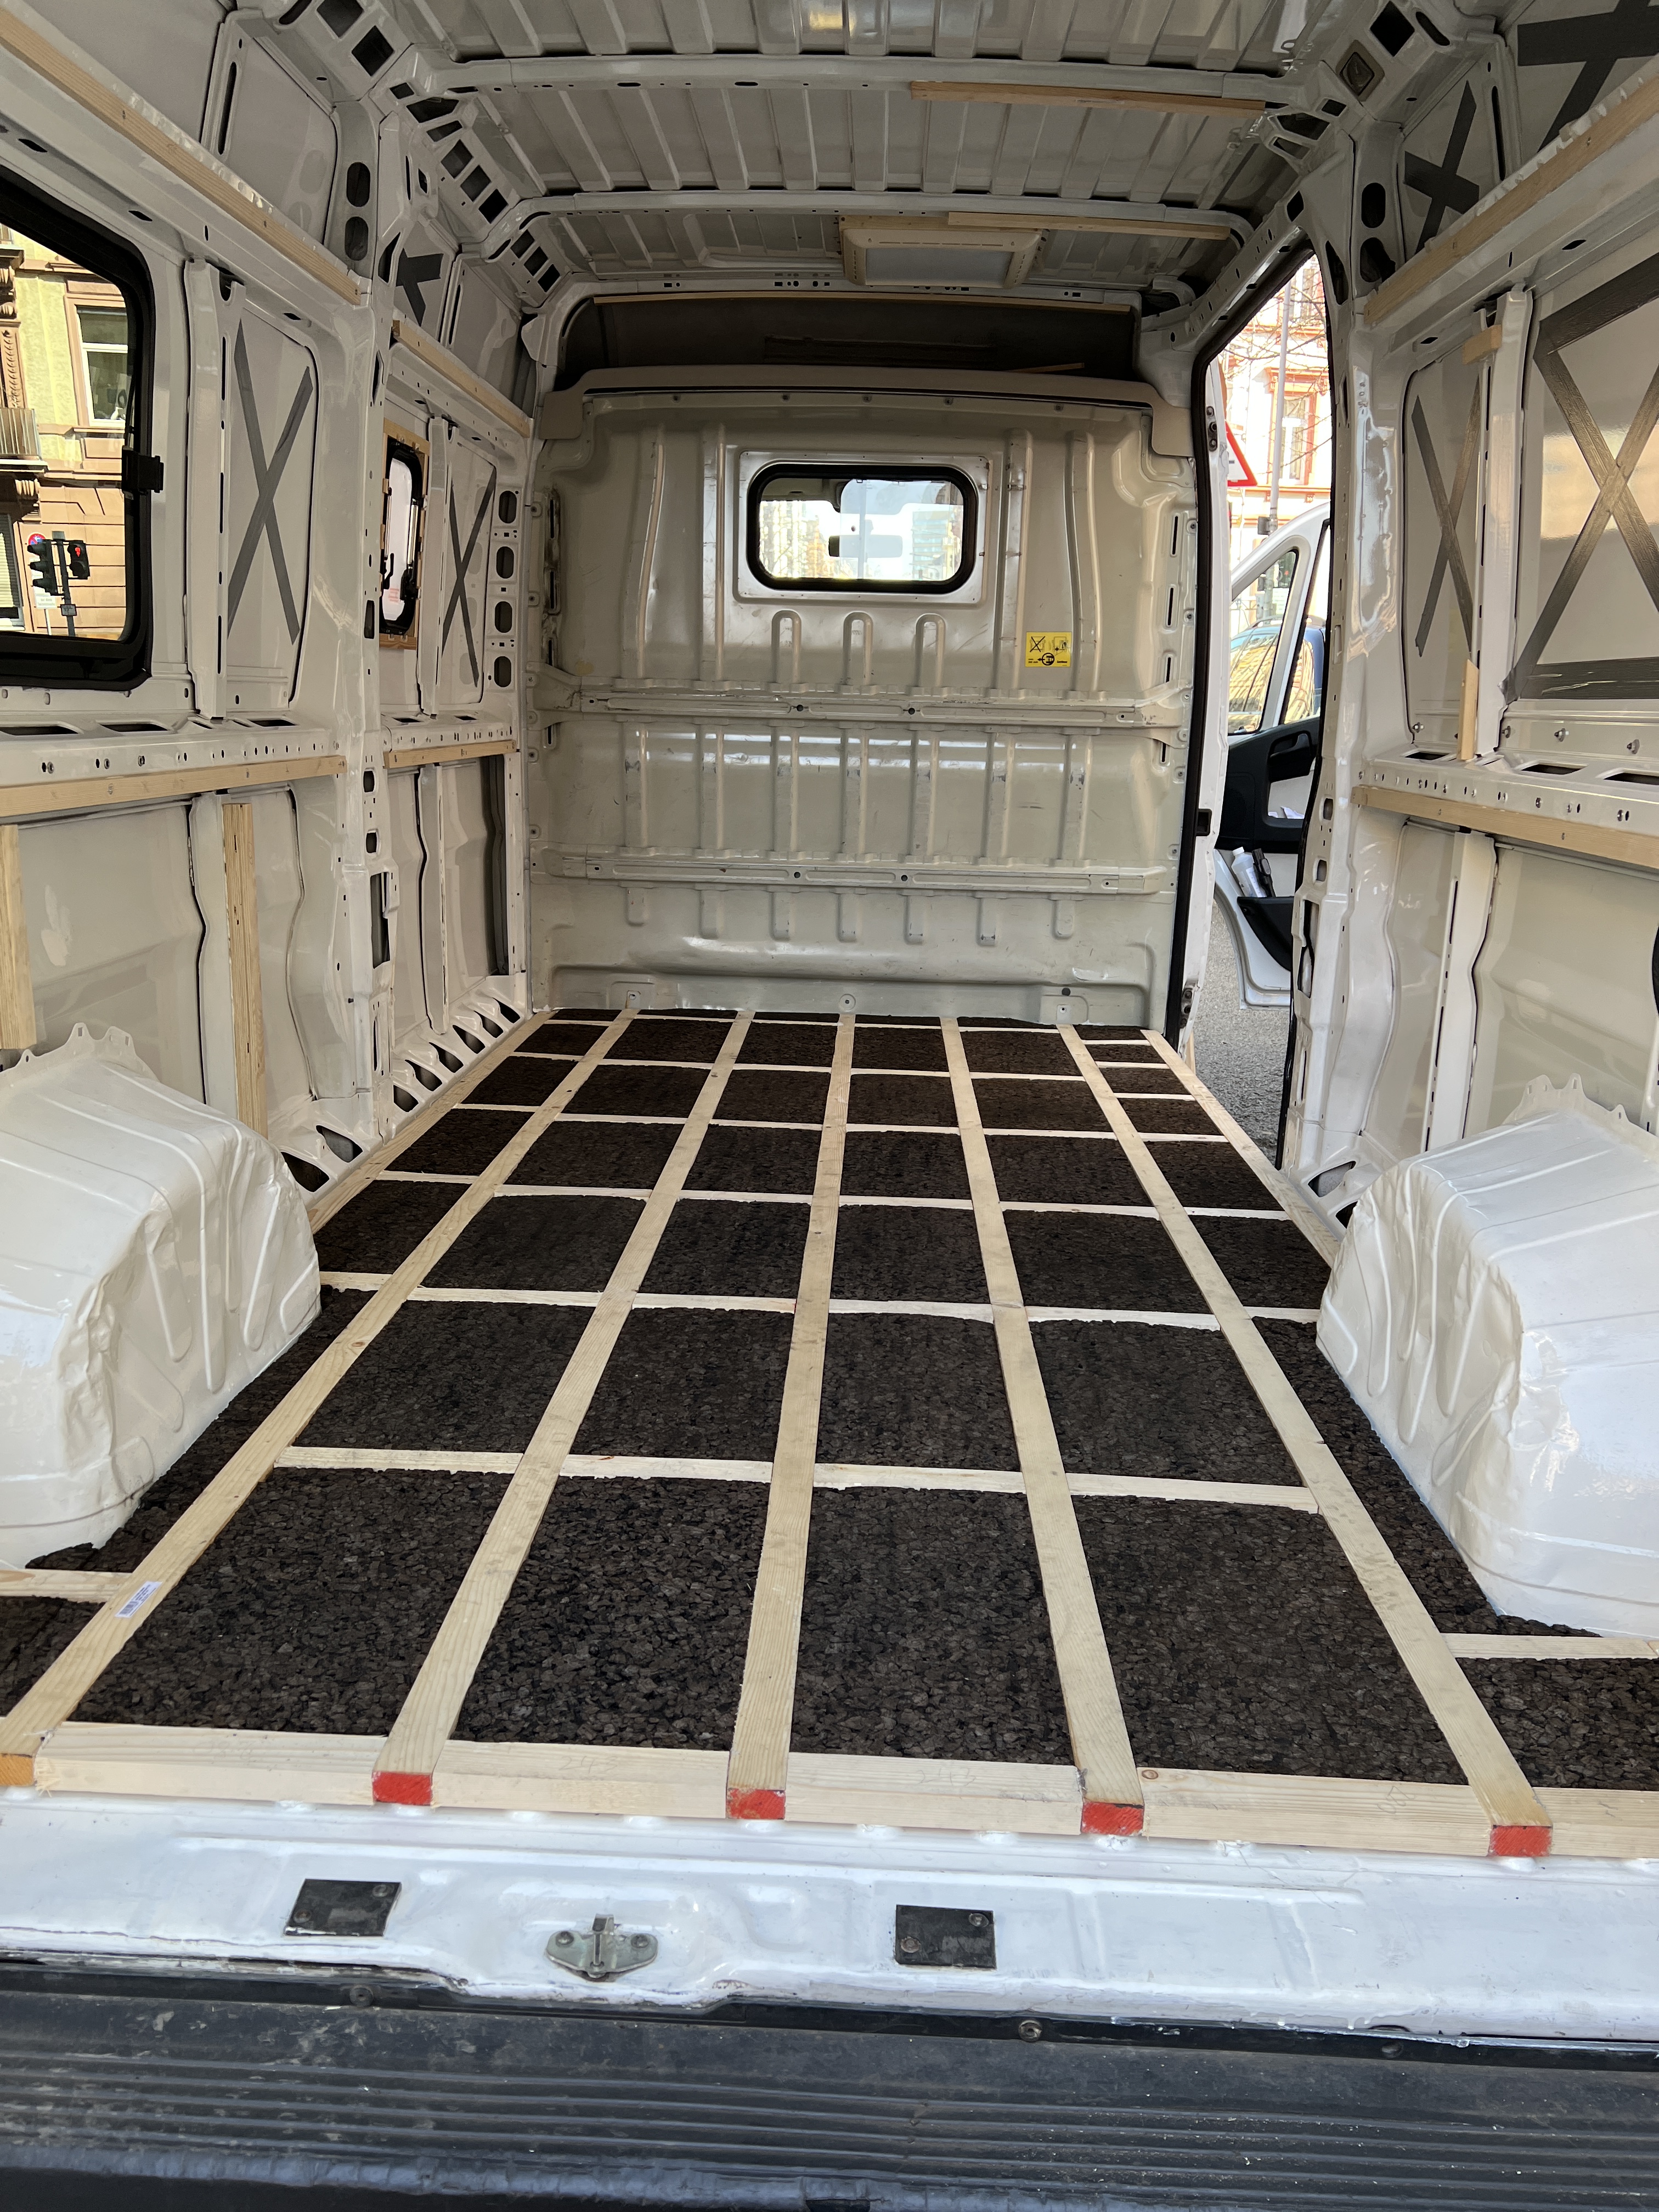
Into the grid we’ve inserted 30mm thick tiles of cork board as an insulation. We’re trying to use as many natural materials as possible and use as little plastic as we can. That’s why we’re using cork insulation for the floors and we’ll be using sheep’s wool to insulate the walls and ceilings.
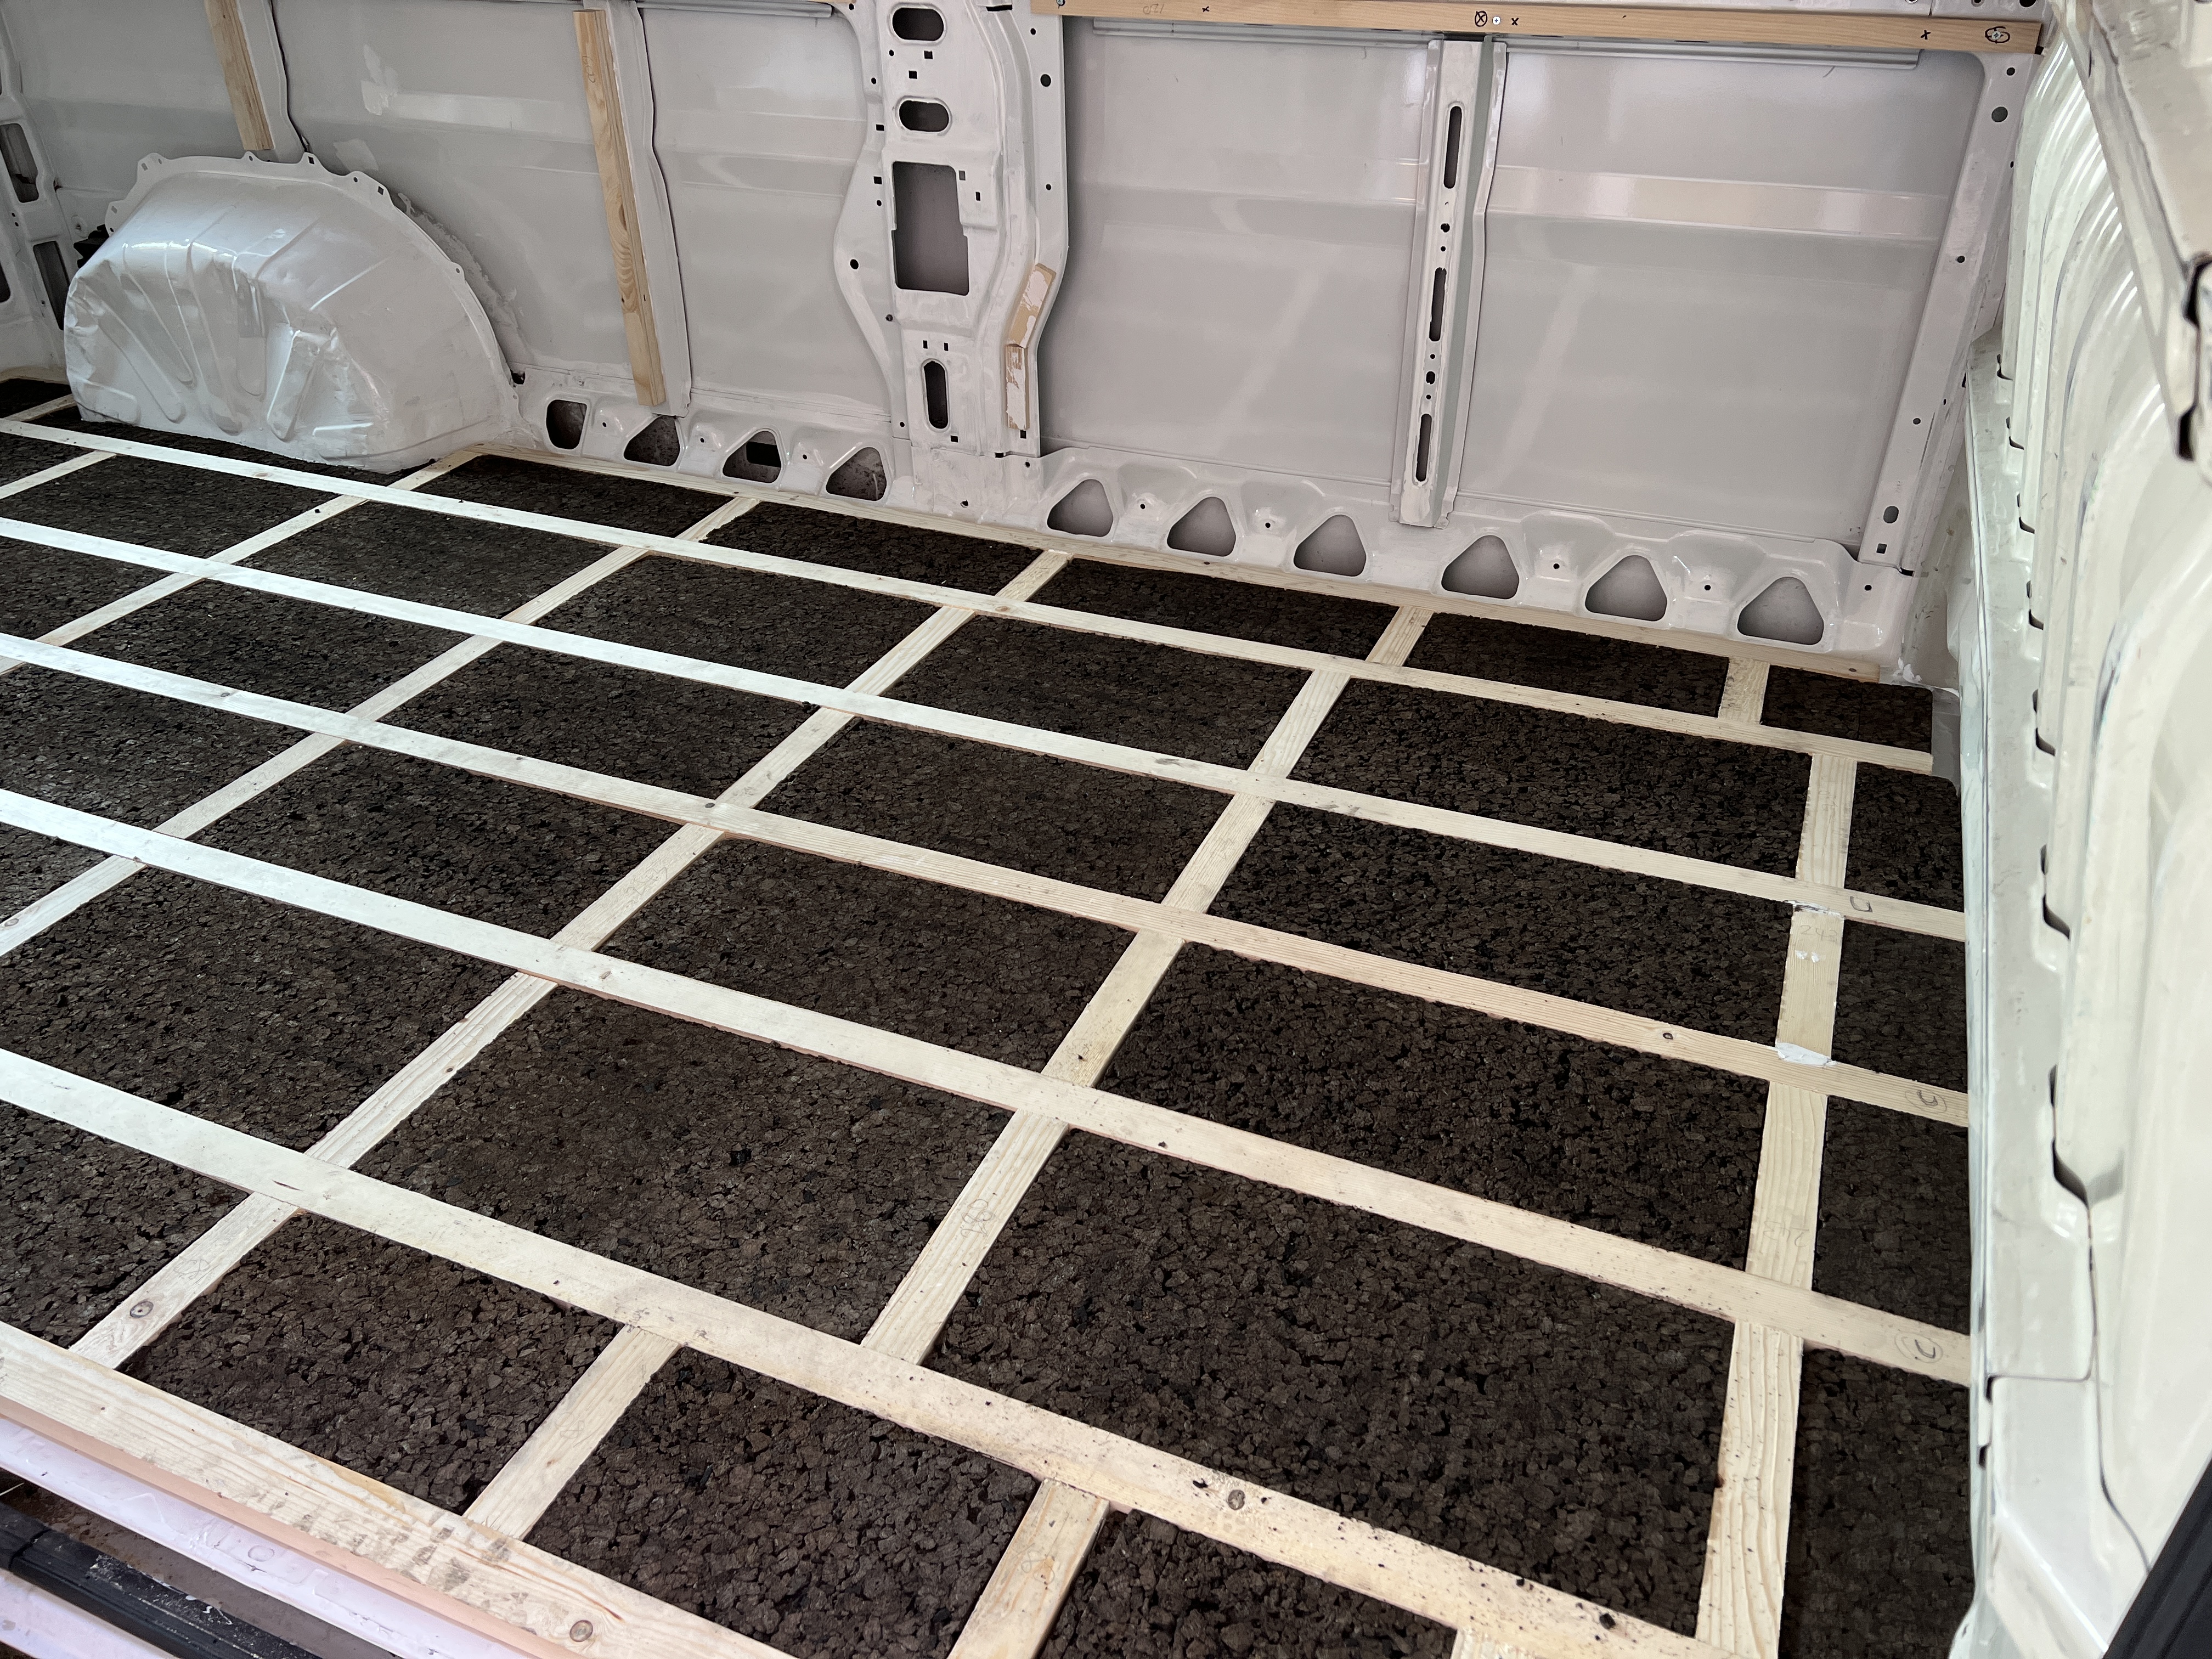


To get a nice consistent size I used our table saw to make sure all the pieces were the right initial dimensions, but this was a bit of a pain because the grid was not a uniform size. We tried to make the lengths of the gaps (running the length of the van) the same and match this to the width of the boards. However, because the floor ridges that we had to glue the battens to weren’t all a uniform distance apart the widths across the van were all different, and as you can see from the pictures there are lots of curves and small non-uniform gaps to fill.
Also, we had to make the gaps smaller in the area in front of the side door to accommodate the extra stress involved in a high-traffic area.
Thankfully, adjusting the size of each cork tile to fit the holes was relatively simple as you can cut it easily with a bread knife.

Floor Covering
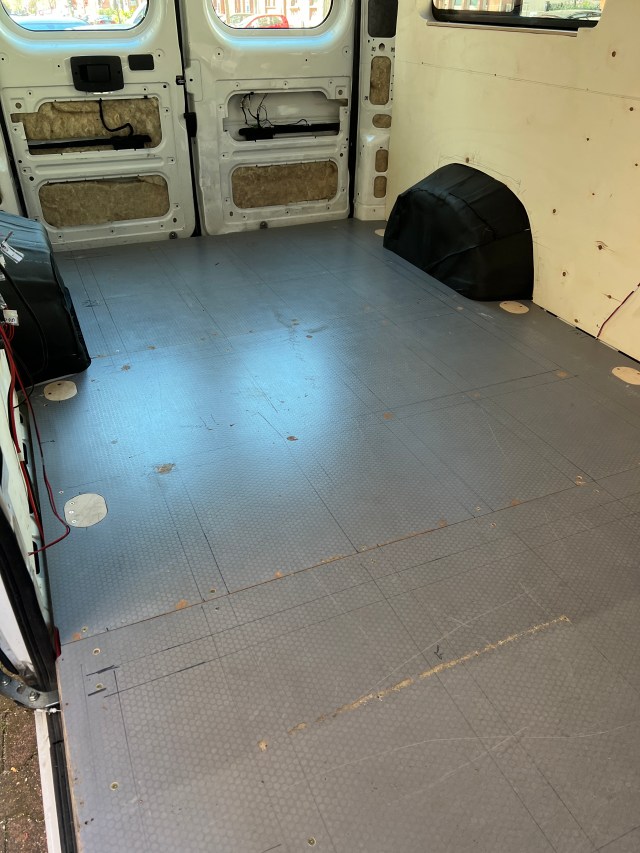
Once the battens and insulation were laid it was time to put back the original floor boards, screwing them into the battens for added security. These are 10mm thick plywood boards and are exactly cut to the shape of the van, so reusing them saved us quite a bit of time and money. They didn’t look too pretty after years of abuse but we are going to be covering them them so they’ll never be seen again.
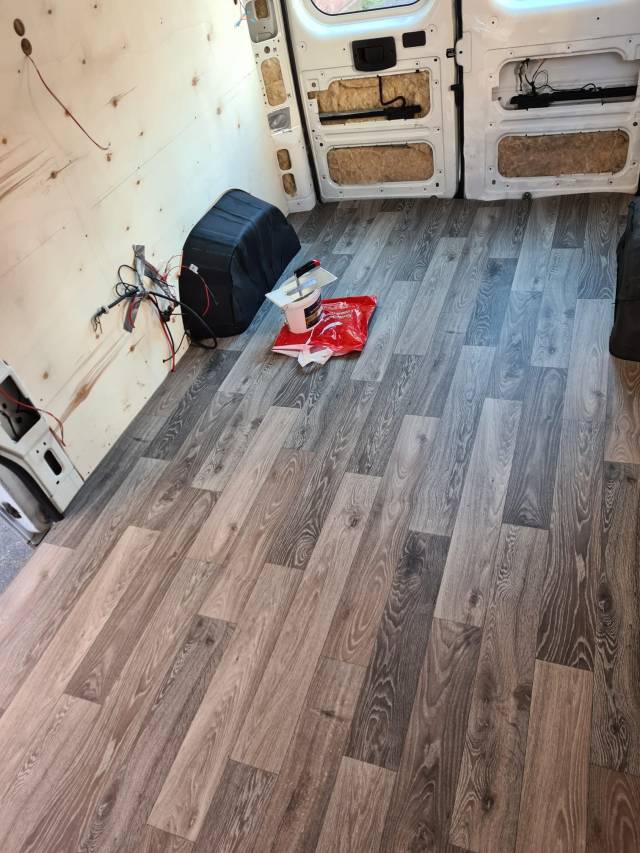
For the floor covering we’ve chosen wood-effect vinyl, which is so hard wearing it’ll apparently last 30 years! So at least we’ll have something left over when the van rusts around us.
We used the original floor boards as a template to cut out the shape of the flooring, leaving a 2cm buffer on each side.
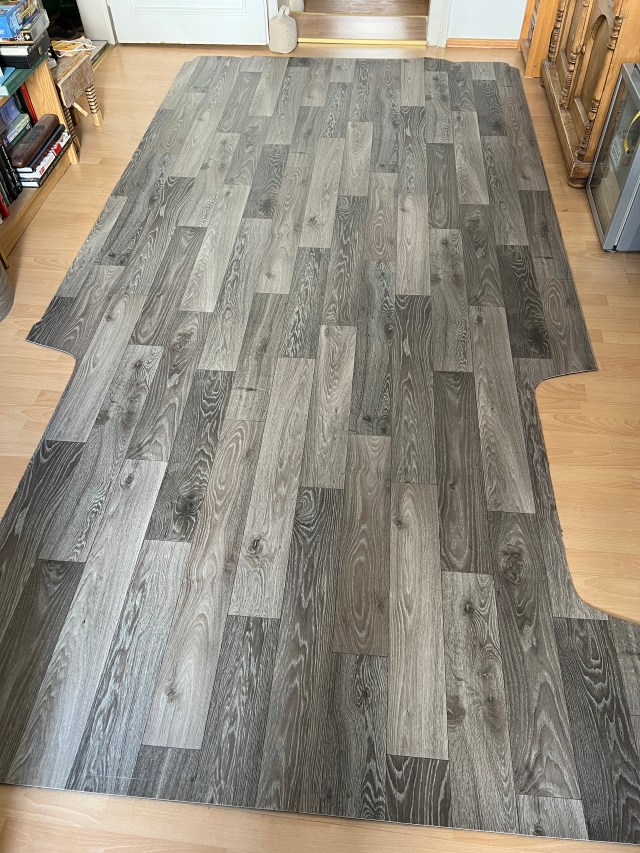
We then rolled it up and then laid it in the van and used a special adhesive to stick it down to the wood surface. We now have a lovely wood-effect floor.
You can see the full gallery here.
Next steps
Next up – finishing the electrical installation.
Further Reading
If you’re interested in seeing what equipment and materials we used, or want to watch some of the instructional videos we found useful, then just click the button below.

Looking good!
Come do mine, when I finally buy a van
LikeLike
Mate, I won’t be attempting anything like this again for a while! Literal blood, sweat, and tears have gone into this
LikeLike
I have plenty of advice on what not to do though 🤣
LikeLike
Pingback: Walls, ceiling, and window frames – Viamkarlito